物联网实战:Spring Boot + Netty 搭建 MQTT 统一接入层
源码(sample-00-iot-access)
https://gitee.com/kcnf-iot/mqtt-boot/tree/master/sample-00
sample-00-iot-access 项目目录
1. connection/ - 连接日志管理
2. heartbeat/ - 心跳处理
3. log/ - 日志处理
4. reg/ - 注册管理
5. security/ - 安全相关(ACL、限流、SSL)
6. config/ - 配置类
7. udp/ - UDP 模板文件
模块概述
是整个物联网平台的消息接入层核心模块,负责处理所有设备的网络连接和协议交互。该模块基于 Netty 框架构建,支持多协议接入,具备高性能、高可用的特点。
核心职责:
- 多协议支持:MQTT、TCP、CoAP、HTTP/WebSocket、UDP
- 连接管理:设备连接建立、认证、心跳保活、断开处理
- 协议编解码:不同协议的报文解析与封装
- 安全控制:SSL/TLS 加密、访问控制列表(ACL)、流量限流
- 日志追踪:连接日志、心跳日志、消息追踪(TraceID)
- 二进制协议解析:支持通过模板配置文件解析自定义二进制协议
技术栈:
- Netty 4.x(NIO 异步网络框架)
- Spring Boot 3.x(依赖注入和配置管理)
- JPA + SQLite/MySQL(数据持久化)
- 可选:Redis(分布式连接管理)
架构设计
整体架构
┌─────────────────────────────────────────────────────────────────┐
│                         设备层                                    │
│   ┌────────┐  ┌────────┐  ┌────────┐  ┌────────┐  ┌────────┐ │
│   │  MQTT  │  │  TCP   │  │  CoAP  │  │  HTTP  │  │  UDP   │ │
│   │ 设备   │  │ 设备   │  │ 设备   │  │ 设备   │  │ 设备   │ │
│   └────────┘  └────────┘  └────────┘  └────────┘  └────────┘ │
└───────────────────────────┬─────────────────────────────────────┘
                            │
┌───────────────────────────▼─────────────────────────────────────┐
│                      协议适配层                                   │
│  ┌──────────────┐ ┌──────────────┐ ┌──────────────┐ ┌─────────┐│
│  │    MQTT      │ │    TCP       │ │    CoAP      │ │  HTTP   ││
│  │  Adapter     │ │  Adapter     │ │  Adapter     │ │ Adapter ││
│  └──────────────┘ └──────────────┘ └──────────────┘ └─────────┘│
└───────────────────────────┬─────────────────────────────────────┘
                            │
┌───────────────────────────▼─────────────────────────────────────┐
│                      安全处理层                                   │
│   ┌─────────────┐  ┌─────────────┐  ┌─────────────┐            │
│   │ SSL/TLS    │  │ ACL过滤器   │  │ 限流拦截器  │            │
│   └─────────────┘  └─────────────┘  └─────────────┘            │
└───────────────────────────┬─────────────────────────────────────┘
                            │
┌───────────────────────────▼─────────────────────────────────────┐
│                      消息处理层                                   │
│   ┌─────────────┐  ┌─────────────┐  ┌─────────────┐             │
│   │ TraceID    │  │ 心跳检测   │  │ 协议解码器  │             │
│   │ 处理器     │  │ Handler     │  │             │             │
│   └─────────────┘  └─────────────┘  └─────────────┘             │
└───────────────────────────┬─────────────────────────────────────┘
                            │
┌───────────────────────────▼─────────────────────────────────────┐
│                      事件发布层                                   │
│   ┌─────────────┐  ┌─────────────┐  ┌─────────────┐             │
│   │ 设备上线   │  │ 设备离线   │  │ 消息事件   │             │
│   │ 事件       │  │ 事件       │  │             │             │
│   └─────────────┘  └─────────────┘  └─────────────┘             │
└─────────────────────────────────────────────────────────────────┘
核心组件详解
多协议服务器
本模块支持同时启动多种协议的服务器,通过 Spring Boot 的条件注解实现灵活配置
MQTT 服务器
负责处理 MQTT 协议的设备连接,支持 MQTT 3.1.1 和 MQTT 5.0 版本
文件位置:MqttServer 配置参数:
mqtt.broker.mqtt.enabled: true           # 启用MQTT服务器
mqtt.broker.mqtt.port: 1883             # MQTT端口
mqtt.broker.mqtt.tlsEnabled: false      # 是否启用TLS
初始化管道:
TraceIdHandler          → 追踪日志
MqttEncoderMonitor      → 编码监控
MqttDecoder(10MB)      → MQTT解码器
MqttEncoder             → MQTT编码器
IdleStateHandler        → 空闲检测
HeartbeatHandler        → 心跳处理
MqttMessageHandler       → 消息分发
UDP 服务器
基于 Netty 的 NIO/Epoll DatagramChannel 实现,处理 UDP 数据报。
文件位置:UdpServer 配置参数:
mqtt.broker.udp.enabled: true
mqtt.broker.udp.port: 8666
mqtt.broker.udp.worker-threads: 8
mqtt.broker.udp.recv-buffer: 1048576    # 接收缓冲区大小
核心特性:
- 自动选择 Epoll(Linux)或 NIO(跨平台)
- 大缓冲区配置减少丢包
- 固定数据包大小优化内存分配
TCP/CoAP/HTTP 服务器
类似的架构设计,支持自定义 TCP 二进制协议、CoAP 协议、HTTP/WebSocket 协议。
协议适配器
每个协议都有对应的适配器,负责协议消息与内部消息的转换
MqttProtocolAdapter
文件位置:MqttProtocolAdapter 核心功能:
| 方法 | 功能说明 |
|---|---|
handleMqttMessage() | MQTT 消息总入口,根据消息类型分发 |
handleConnect() | 处理 CONNECT 报文,设备认证和连接建立 |
handlePublish() | 处理 PUBLISH 报文,发布消息到事件总线 |
handleSubscribe() | 处理 SUBSCRIBE 报文,主题订阅 |
handlePingReq() | 处理 PINGREQ 心跳请求 |
handleDisconnect() | 处理 DISCONNECT 断开连接 |
sendDownstream() | 下行消息发送(服务端→设备) |
消息流程:
MQTT设备 → TCP连接 → MqttDecoder → MqttMessageHandler
    ↓
MqttProtocolAdapter.handleMqttMessage()
    ↓
根据消息类型分发到对应处理方法
    ↓
发布 Spring 事件(DeviceOnlineEvent/MessageEvent等)
    ↓
其他模块(Routing/Business)订阅处理
UdpProtocolAdapter
文件位置:UdpProtocolAdapter
特点:
- 无连接状态,不维护 Channel
- 每次消息独立处理
- 支持心跳日志记录
- 通过 EventPublisher 发布消息事件
二进制协议解析
本模块支持通过模板文件解析自定义二进制协议,特别适用于 UDP 场景下的设备数据采集
解析流程
UDP数据报 → UdpMessageDecoder
    ↓
检测消息格式(JSON/BINARY/TEXT)
    ↓
如果是 BINARY 格式
    ↓
根据第一字节确定模板名称
    ↓
ProtocolTemplateLoader 加载对应 .tpl 文件
    ↓
BinaryProtocolParser 解析二进制数据
    ↓
转换为 JSON 字符串
    ↓
设置到 InternalMessage.payloadStr
    ↓
传递给业务层处理
模板文件格式
文件位置:1.tpl
# 机库(HANGAR)设备二进制协议模板
# 格式: 索引|字段名|类型|倍率|说明
# 协议ID: 1 (作为模板匹配名称)

# 头部
0|protocol_id|UINT8|1|协议标识(值为1)
1|SNCode|STRING|1|设备SN码(13字节)
14|reserved|RESERVED|1|保留

# 版本和状态
15|VerNum|STRING|1|版本号(3字节)
18|RainfallOccurFlag|BOOL|1|降雨标志
19|reserved|RESERVED|4|保留

# 气象数据
23|WindValue|UINT16|0.01|风速(单位m/s)
25|UTCTime|STRING|1|UTC时间(10字节)

# GPS数据
35|LatitudeValue|STRING|1|纬度值(9字节)
44|LatitudeDir|STRING|1|纬度方向(N/S)
...
支持的数据类型
| 类型 | 说明 | 占用字节 |
|---|---|---|
| UINT8 | 无符号8位整数 | 1 |
| UINT16 | 无符号16位整数 | 2 |
| UINT32 | 无符号32位整数 | 4 |
| INT16 | 有符号16位整数 | 2 |
| BOOL | 布尔值 | 1 |
| STRING | 字符串 | 变长 |
| RESERVED | 保留字段(不解析) | - |
核心解析类
BinaryProtocolTemplate
@Data
public class BinaryProtocolTemplate {
    private String protocolName;      // 模板名称(从文件名获取)
    private int protocolId;            // 协议ID
    private int totalLength;          // 总长度
    private int matchStart;           // 匹配起始位置
    private int matchLength;          // 匹配长度
    private List<FieldTemplate> fields;  // 字段列表

    @Data
    public static class FieldTemplate {
        private String name;           // 字段名
        private int startIndex;        // 起始索引
        private int length;           // 字段长度
        private FieldType type;       // 数据类型
        private double multiplier;    // 倍率(用于数值转换)
        private String description;   // 字段说明
    }
}
ProtocolTemplateLoader
public class ProtocolTemplateLoader {
    // 初始化:加载所有 .tpl 文件
    public static synchronized void initialize(String basePath);

    // 根据数据内容获取模板名称(通常根据第一字节)
    public static String getTemplateName(byte[] data, int index);

    // 使用指定模板解析二进制数据
    public static String parse(byte[] data, String templateName);
}
BinaryProtocolParser
public class BinaryProtocolParser {
    public BinaryProtocolParser(BinaryProtocolTemplate template);

    // 解析二进制数据,返回JSON字符串
    public String parse(byte[] data);
}
连接管理
RegManager(注册管理器)
文件位置:RegManager
维护 clientId 与 Netty Channel 的双向映射关系。
接口定义:
public interface RegManager {
    void addConnection(String clientId, Channel channel);  // 添加映射
    void removeConnection(String clientId);                 // 移除映射
    Channel getConnection(String clientId);                 // 根据clientId获取Channel
    String getClientId(Channel channel);                    // 根据Channel获取clientId
}
实现方式:
- InnerCacheRegManager(默认):基于 ConcurrentHashMap 的本地内存实现
- RedisCacheRegManager:基于 Redis 的分布式实现(需配置
mqtt.reg=redis)
ConnectionLogService(连接日志服务)
文件位置:ConnectionLogService.java
记录设备连接的全生命周期日志。
日志状态:
| 状态 | 说明 |
|---|---|
| ESTABLISHED | TCP 连接建立(通道激活) |
| ONLINE | 协议连接成功(MQTT CONNECT 完成) |
| OFFLINE | 连接断开(DISCONNECT 或异常关闭) |
连接日志实体:ConnectionLogDO
| 字段 | 类型 | 说明 |
|---|---|---|
| id | Long | 主键 |
| sessionId | String | 会话ID(串联三个状态) |
| clientId | String | 设备标识 |
| eventTime | LocalDateTime | 事件时间 |
| ipAddress | String | 客户端IP |
| protocol | String | 协议类型(MQTT/TCP/COAP/HTTP) |
| protocolVersion | String | 协议版本 |
| payloadFormat | String | 载荷格式(JSON/BINARY/PROTOBUF) |
| status | String | 状态(ESTABLISHED/ONLINE/OFFLINE) |
心跳管理
HeartbeatHandler(心跳处理器)
文件位置:HeartbeatHandler
基于 Netty 的 IdleStateHandler 实现读空闲检测
@Override
public void userEventTriggered(ChannelHandlerContext ctx, Object evt) {
    if (evt instanceof IdleStateEvent) {
        if (idleEvent.state() == IdleState.READER_IDLE) {
            // 读空闲超时,标记设备离线
            heartbeatCallback.onHeartbeatTimeout(ctx);
        }
    }
}
HeartbeatCallback(心跳超时回调)
文件位置:HeartbeatCallback
@FunctionalInterface
public interface HeartbeatCallback {
    void onHeartbeatTimeout(ChannelHandlerContext ctx);
}
实现:HeartbeatCallbackImpl
@Override
public void onHeartbeatTimeout(ChannelHandlerContext ctx) {
    String clientId = regManager.getClientId(ctx.channel());
    if (clientId != null) {
        // 发布设备离线事件
        eventPublisher.publishEvent(new DeviceOfflineEvent(clientId));
    }
    ctx.close();  // 关闭通道
}
心跳日志记录
文件位置:HeartBeatLogDO
| 字段 | 类型 | 说明 |
|---|---|---|
| id | Long | 主键 |
| deviceKey | String | 设备唯一键 |
| clientId | String | 客户端ID |
| protocol | String | 协议类型 |
| protocolVersion | String | 协议版本 |
| heartbeatTime | LocalDateTime | 心跳时间 |
| clientIp | String | 客户端IP |
| keepAlive | Integer | MQTT Keep Alive 间隔 |
| sessionExpiry | Integer | MQTT 5.0 会话过期时间 |
| onlineDuration | Long | 在线时长(秒) |
| extraProperties | String | 扩展信息(JSON) |
采样策略:心跳日志采用采样记录(默认每 10 次记录 1 次),避免数据库压力。
安全模块
SSL/TLS 支持
文件位置:SslContextFactory
// 创建自签名证书的 SSL 上下文
SslContext createSelfSignedSslContext();

// 从证书和私钥文件创建 SSL 上下文
SslContext createSslContext(String certChainFilePath, String keyFilePath);

// 创建客户端 SSL 上下文(支持信任所有证书)
SslContext createInsecureClientSslContext();
ACL 前置过滤器
文件位置:AclPreFilter
@Override
public void channelActive(ChannelHandlerContext ctx) {
    // 连接建立时的 ACL 校验
    String remoteAddress = ctx.channel().remoteAddress().toString();
    if (isBlocked(remoteAddress)) {
        ctx.close();  // 拒绝连接
        return;
    }
    ctx.fireChannelActive();
}
令牌桶限流
文件位置:RateLimiterInterceptor
默认配置:
| 参数 | 默认值 | 说明 |
|---|---|---|
| rateLimit | 100 | 每秒允许的请求数 |
| burstCapacity | 10 | 突发容量 |
TokenBucket 算法:TokenBucket
public boolean tryConsume() {
    refill();  // 补充令牌
    return tokens.getAndDecrement() > 0;  // 消费令牌
}
日志追踪
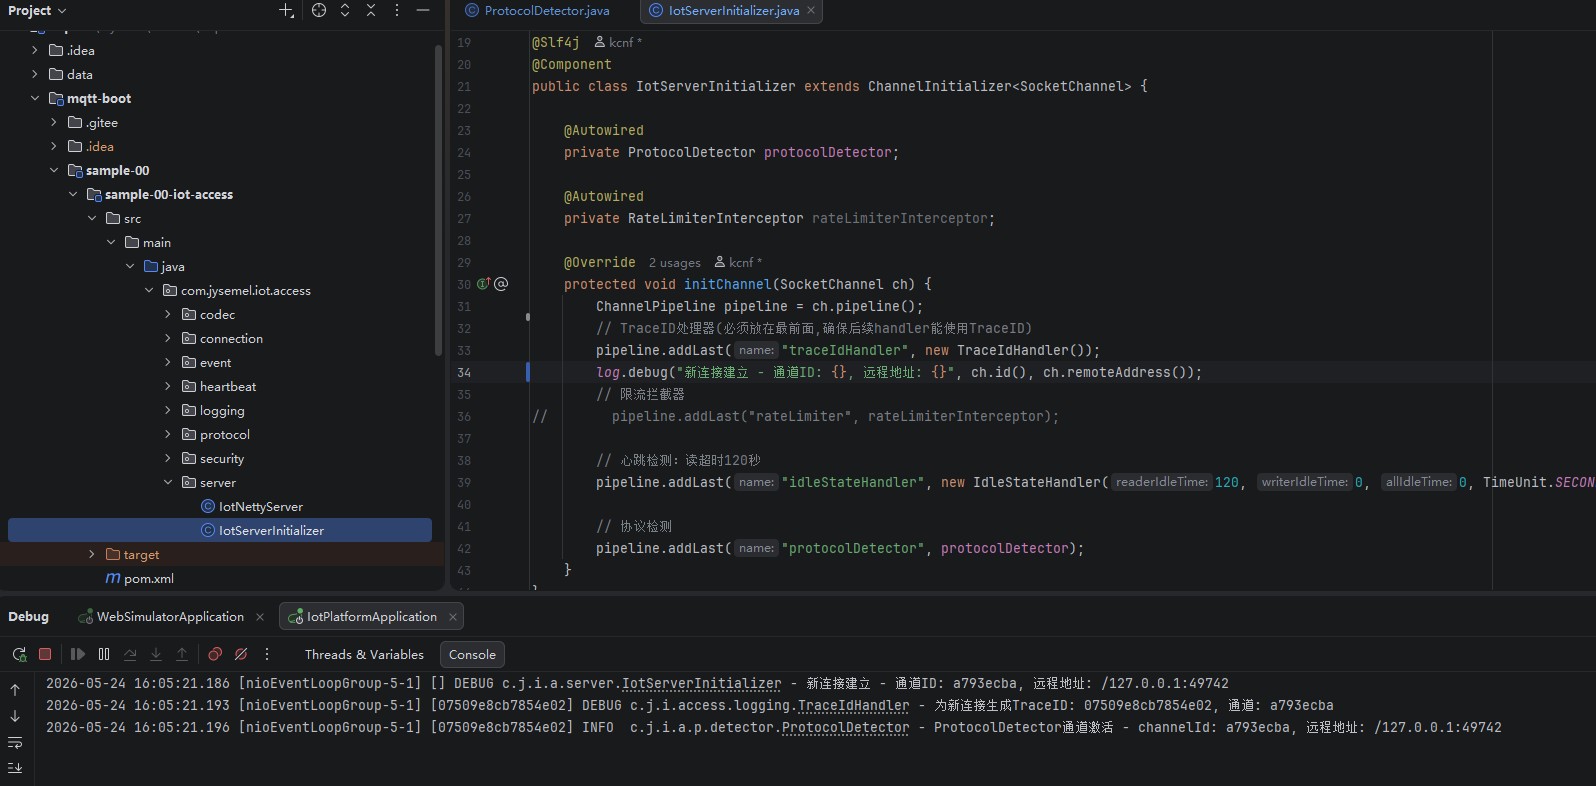
TraceIdHandler
文件位置:TraceIdHandler
为每个消息处理流程生成独立的 TraceID,便于日志关联分析。
@Override
public void channelRead(ChannelHandlerContext ctx, Object msg) throws Exception {
    String traceId = TraceIdUtil.generateAndSet();
    try {
        log.debug("消息处理开始 - traceId: {}, channel: {}", traceId, ctx.channel().id());
        super.channelRead(ctx, msg);
    } catch (Exception e) {
        log.error("消息处理异常 - traceId: {}", traceId, e);
        throw e;
    } finally {
        TraceIdUtil.clear();  // 清理 ThreadLocal
    }
}
事件模型
事件类型
| 事件类 | 说明 | 发布时机 |
|---|---|---|
| DeviceOnlineEvent | 设备上线 | MQTT CONNECT 成功 |
| DeviceOfflineEvent | 设备离线 | DISCONNECT / 心跳超时 / 异常断开 |
| DeviceSubscribeEvent | 设备订阅 | SUBSCRIBE / UNSUBSCRIBE |
| MessageEvent | 消息事件 | 设备发布消息 |
InternalMessage 内部消息模型
文件位置:InternalMessage
| 字段 | 类型 | 说明 |
|---|---|---|
| messageId | String | 消息唯一标识 |
| topic | String | 主题 |
| msgType | String | 消息类型 |
| payload | byte[] | 原始载荷 |
| payloadStr | String | 字符串载荷(JSON或解析后的二进制) |
| payloadType | String | 载荷类型 |
| qos | int | 服务质量等级 |
| retained | boolean | 保留消息标志 |
| direction | Direction | 方向(UPSTREAM/DOWNSTREAM) |
| protocol | String | 协议类型 |
| ip | String | 来源IP |
| port | int | 来源端口 |
| timestamp | long | 时间戳 |
配置说明
自动配置类
文件位置:AutoServerConfiguration
通过 @ConditionalOnProperty 注解实现协议的灵活启用:
@Bean
@ConditionalOnProperty(name = "mqtt.broker.mqtt.enabled", havingValue = "true", matchIfMissing = true)
public MqttServer mqttServer(...) { ... }

@Bean
@ConditionalOnProperty(name = "mqtt.broker.udp.enabled", havingValue = "true", matchIfMissing = true)
public UdpServer udpServer(...) { ... }
线程池配置
文件位置:LogDbExecutorConfig
@Bean("logDbExecutor")
public Executor logDbExecutor() {
    ThreadPoolTaskExecutor executor = new ThreadPoolTaskExecutor();
    executor.setCorePoolSize(4);
    executor.setMaxPoolSize(8);
    executor.setQueueCapacity(500);
    executor.setThreadNamePrefix("heartbeatLog-");
    return executor;
}
使用指南
启用/禁用协议服务
# 启用 MQTT(默认启用)
mqtt.broker.mqtt.enabled: true
mqtt.broker.mqtt.port: 1883

# 启用 TLS
mqtt.broker.mqtt.tlsEnabled: true

# 启用 UDP
mqtt.broker.udp.enabled: true
mqtt.broker.udp.port: 8666
添加新的二进制协议模板
- 在
resources/udp/目录下创建.tpl文件 - 命名规则:第一字节值作为文件名(如
1.tpl) - 定义字段格式:
索引|字段名|类型|倍率|说明
# 示例:温湿度传感器协议
0|protocol_id|UINT8|1|协议标识(值为2)
1|temperature|INT16|0.1|温度值
3|humidity|UINT16|0.1|湿度值
5|device_id|STRING|1|设备ID(8字节)
- 模板会被自动加载和匹配
自定义限流策略
// 使用自定义参数创建限流器
RateLimiterInterceptor limiter = new RateLimiterInterceptor(200, 20);  // 200请求/秒,突发20
扩展建议
添加新协议适配器
- 创建协议适配器类继承
AbstractProtocolAdapter - 实现
handleUpstream()和sendDownstream()方法 - 创建服务器初始化器配置 ChannelPipeline
- 在
AutoServerConfiguration中添加 Bean 配置
添加新的存储实现
- 实现
ConnectionLogService接口 - 使用
@ConditionalOnProperty(name = "storage.mode", havingValue = "your-mode")注解 - 实现对应的 Repository
集成外部认证
在 AclPreFilter 中集成外部 ACL 服务:
private boolean isBlocked(String remoteAddress) {
    // 调用外部 ACL 服务
    return aclService.isBlocked(remoteAddress);
}
总结
sample-00-iot-access 模块作为物联网平台的消息入口,具备以下核心能力:
- 多协议接入:一站式支持 MQTT、TCP、UDP、CoAP、HTTP 等主流物联网协议
- 高性能:基于 Netty NIO/Epoll 构建,单机可支持数万并发连接
- 可扩展:插件化的协议适配器设计,便于添加新协议支持
- 安全可靠:内置 TLS/SSL、ACL、限流等安全机制
- 可观测:完整的日志追踪、连接日志、心跳日志
- 灵活配置:通过注解和配置文件实现灵活启用/禁用各功能
验证结果